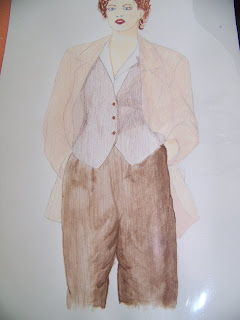
Once upon a time, there was a young girl who went off to college {Texas Tech...that awesome school that whooped Texas this past weekend... :o) } to study architecture. As an incoming Freshman in the architecture program, she was recommended to buy an art kit which included watercolor pencils. The young girl was never instructed on how to use these wondrous watercolor pencils so she simply used them as colored pencils (albeit very expensive ones for the time.)
Fast-forward 3 years to the young girl's Junior or Senior year of college (it's hard to remember which) and at midnight the young girl was desperately trying to figure out how to draw corduroy for her fashion design class (yes, there had been a slight degree change in the interim.) Suddenly inspiration struck and she decided to add a bit of water to her colored pencil image and magic was created (at least as much magic as there can be for an artistically challenged young lady whose main love is art.)
Fast forward another 15 (or so) years, and we come to the present time in our story when the once young girl (who has NEVER used her degree) is now a bit older and still dabbling on the fringes of art in the stamping world. The stamping world, though, has become obsessed with a wonderful new tool called Copics markers and, while they create an amazing effect, at $6/marker our girl just cannot stand to pay that kind of price when her wondrous watercolor pencils work just as well (and can be bought at Michael's with the 50% off coupon although this girl is still using the exact same set as she bought in college. Such a bargain!)
*************************************
Now are you ready to see how EASY it is to color and shade with watercolor pencils???
The basic tools:
*cardstock (I buy the cheap packages at Walmart or office supply stores and it does fine)
*watercolor pencils (Derwent is the brand that I use that I got in college although I have had to supplement with a few additional colors lately, but they are also Derwent from Michaels)
*waterbrush (I LOVE this tool and would NEVER exchange it for a real brush...it ROCKS!)
*permanent inkpads (I use these three exclusively for my watercoloring)
*stamps

My watercolor technique is incredibly basic, but it seems to work well and is super-easy so I see no reason to make it more difficult. LOL! Basically, I just scribble a bit of the color that I want in the corners/edges of my stamped image....
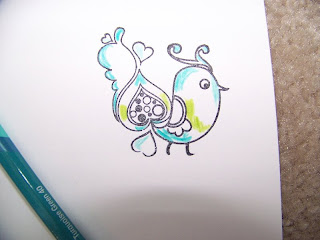
I then take my waterbrush (wet, but not dripping...almost just a damp brush) and pull the ink from the edges to the center. That sounds and looks more difficult than it is, but believe me, it couldn't be easier. The water and these wonderful pencils do all the work for you. Here you can see the bird's body is done, but not the tail.

The completed image and the colors that I used on the bird...

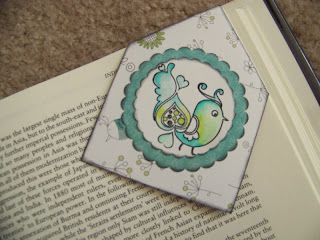
I used this particular bird to make a bookmark like the one
here that I showed you a few week's ago.
******************************************************
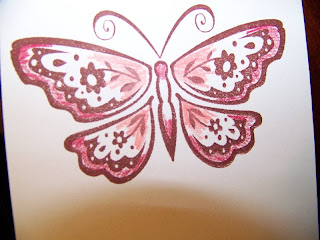
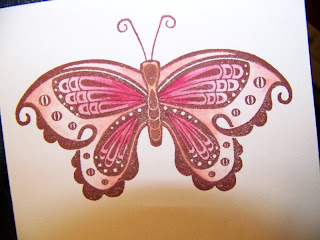
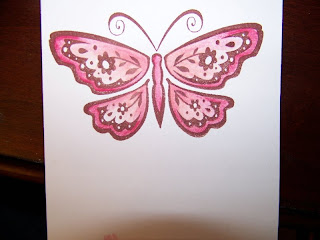
And here are a couple of butterflies that I watercolored too, although you won't see the full project reveal on them until tomorrow's Hip-Hop post.
Step 1: Color just along the edges/corners.
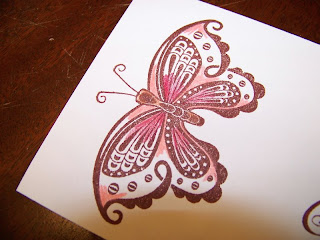
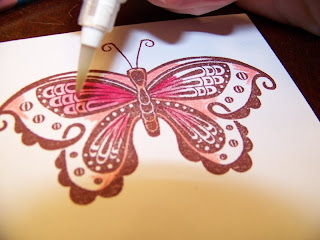
Step 2: Begin blending by using the waterbrush drawing the color into the white areas.
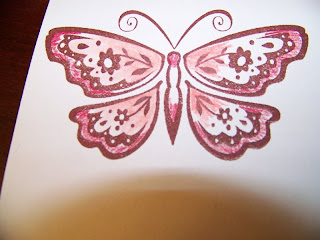
Step 3: Continue blending until you are happy with the look. Play with it and experiment with your colors. Both of these butterflies are shown with just their left wing done...the right sides haven't had water added to them yet.
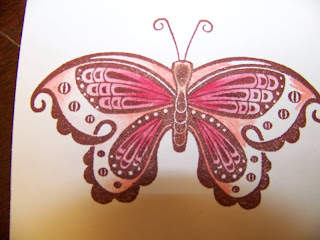

Step 4: Voila! Gorgeous blending done in a snap (you didn't even have to color prettily to make it happen!)


12 comments:
Thanks for the story and tips on watercolor pencils! :)
That is sooo inspirational, especially in this time of a rotten economy! I really don't have to have Copics when I can resurrect my watercolor pencils.
Wow, it does look easier than I thought. Do you ever have problems with it bleeding outside the lines?? I just finally ordered my watercolor pencils the other day but they don't come with a water brush. I'm guessing I could get one of those separately at a place like Hobby Lobby??
Hi, Kelly! It really is super-easy. I VERY RARELY have issues with bleeding. I think that my cheap cardstock helps as I have heard of people having issues with the name-brand stuff.
Yes, you have to buy the waterbrush separate. I have had mine for ages so I am not for sure where all they are stocked in the craft stores, but I did see some the other day on the art supply aisle of Hobby Lobby (where they keep all the pens back by framing.) I think they run about $5.
smiles,
Christi
You make me laugh!! That was a great tutorial!!..and a great story too..;-)
super fun! I never use my water color pencils. As a kid i used to steal my dad's (he's an artist) and wet the pencil itself and use to to draw on myself and create makeup designs. And then here i am today. haha. You've inspired me. maybe i'll pull out the watercolor pencils tomorrow at hip hop!
FABULOUS...really honestly......why can't i do that??? Must give try with your lovely tips and pics!!!!
xoxox
annie
Once upon a time there was a girl (me) who really appreciated her talented and crafty friend (you) who always had great tips and easy-to-follow instructions on her blog.
Thanks for the inspiration -- now I really want to try this! :)
this is fabulous! I too love using my watercolor pencils. Great tutorial! Love the coloring you did!!
071034750
That was such a GREAT tutorial! I've already printed off a coupon and I am just itching to get to Michaels right now to get me a set! If I can't have Copics, then I think watercolors can be this girl's new best friend! Can't wait to try it out tonight!
Thanks again for sharing!
P.S. Don't mind the random gibberish of numbers...that's what I get for trying to switch between a work screen and blogs! *giggles*
Wow! Terrific job!
Post a Comment